Why should you do it yourself? DIY is the in the thing and everyone is trying to be creative to build something for their own. Studies show that people actually value things they have built themselves than what they have bought.
Rebranded shoes, expensive shoes, fashionable shoes there are all types of shoes. So, what about DIY recyclable shoes? Before you even stop reading you should hear me out.
We all have an old pair of shoes which we feel like we should throw them in the next minute. However, there is some bit of value in them because they might have been your first designer shoes. Well, this article is going to help you turn those shoes into a pair of fab footwear.
In This Post
The Best Ideas for Your DIY Recyclable Shoes
Here is a look at some fun DIY tutorials which are bound to change your shoe closet.
DIY Wedding Personalized Glitter Sneakers
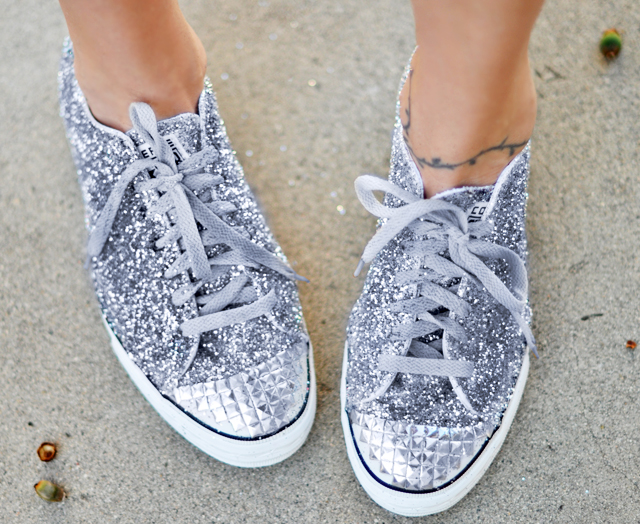
DIY Glitter Sneakers image credit: Love Maegan
Glittered sneakers are the easiest and most affordable projects which you can do. The maximum time limit which you might use is around 2hours. Here is how to go about it. Read about the best shoe paint brands here.
Supplies
- Sneakers of any color
- Paint brushes
- Masking tape
- Sponge wedges
- Q-tips
- Glitter vials
- Adhesives
- Plastic knives
- Plastic bowls with lids
Steps to follow
- Remove the shoelaces.
- Apply a masking tape around the edge of the soul and on each side of the shoe.
- Mix the glitter with adhesive until they are all well blended.
- Take the sponge wedge and apply glitter around your shoe.
- Use the Q-tip to apply glitter all around the shoe eyelets.
- Use your fingernails to remove glitter which is spread unevenly on your shoe.
Tip: Do not expose your shoe to any moisture for the next 48 hours.
DIY Giving Shoes the Fabric Treatment
There are times when our shoes need some fabric additions either on the sole or tongues. But if you don’t know how to do it then this DIY tutorial might just help out.
Supplies
- A pair of shoes
- Fabric glue
- Fabric
- A pair of scissors
Steps to follow
- Create a pattern for the actual shape of the shoe.
- Glue the fabrics around your shoe.
- However, if this seems difficult you can still opt to glue random pieces all over the shoe.
DIY Chain Heels
This DIY tutorial is bound to make your heels look like they are worth a million bucks.
Supplies
- High Heels
- Thick gold chain
- Pliers
- Scissors
- Gold or yellow thread
- Small upholstery needle
Steps to follow
- Use the pliers to unlink at least four chains. Ensure that they can run from top to bottom.
- Use the upholstery needle to sew the chain on top of the shoe straps.
- Remove the ankle strap from the shoe.
- Do the same for your second shoe and get to rock your new heels.